The K4ICY Antenna Launcher The Steampunk-styled air cannon sending tennis balls flying at 500 mph! - Build your own! ...Instructions Below...   This is the result of a week of creative spray painting. It has a copper and brass steam boiler look. The style is coined: "Steampunk". There is more aesthetic work planned for the launcher. After nearly throwing my arm out to install my three band dipole and only getting it elevated around 45' at that, I knew it was time to get a hold of a decent tennis ball launcher! These launchers use compressed air to accelerate a weighted tennis ball sufficiently enough up through the air to tow a mono-filament fishing line over any branch or tree. The line is then used to string over a wire ham radio antenna and by pre-choosing the proper fill pressure one can get their favorite dipole up and out 400' or more if need be! We've used them before at previous ham radio ARRL Field Day events and I was impressed with the results. I had my own wire antennas to install, so the problem I had was where to find one to use... or could I simply make one? I needed to do a little research...  It turns out there's a great web site setup by a couple of hams just to satisfy the above question: http://www.antennalaunchers.com/antlaunching.html It's a great site that will educate you on the basics, intricacies and even safety issues, procuring, building and using pneumatic antenna launching systems. SAFETY DISCLAIMER: Michael A. Maynard [a.k.a. K4ICY] and this site does not condone the illicit or inappropriate use of this or any related device. Such a device can cause serious injury and death (which is not an overstatement,) and any builder wishing to take on this project or operate one built by anyone (particularly without any insurance or liability coverage) does so at their own risk. The builder is encouraged to understand and research the possible and numerous dangers with any associated fabrication and use of any device which can accelerate a projectile and should consider the implications of doing so outside of any legally forbidding jurisdiction. The ATF, at the time of this update, allows for the (safe) use of air launchers as the propulsion mechanism used to accelerate the projective is neither explosive or uses a flame, but uses compressed air. [There is specific writing on the use of air launchers and I'll update when I find it] Of course, it is understood that this device should be used in a safe manner for its intended purpose - AND - doesn't use a chemical propellant.. How does my build differ from the ones you can buy from Antenna Launchers.com? • POWER! My launcher has double the pneumatic charging volume and can launch the projectile to 300' with 80psi, or 500'+ with 100psi! • Lower Cost Why pay $110 from someone else if you can build it yourself for a fraction? • "Coolness" Factor... My launcher has been decorated to have what's called a "Steampunk" aesthetic, styled after plausible technology of the late 1800's. By the way, most who first inspects my launcher believes it's made from real metal. What better PR device than a killer work of art at Field Day that is also functional! I'll state now that I'm NOT currently building any, just in case you were going to ask. If you choose to build one yourself, please make good notes from many of the website that teach the building of "Spud Guns" or "Tennisball Launchers." There are companies that sell parts such as barrels and valves. I'll not get into exact dimensions and details. If you are, in fact able to build one then you are just as apt to figure out the nuts and bolts yourself. It should be a personal project, adding your own solutions, touches and aesthetic. There are two hurdles to overcome in procuring parts: The valve modification and obtaining the barrel material. The barrel must be the exact size match to that of the diameter of a tennis ball or other projective (which varies) and must be pressure rated. The best PVC pipe type that I've found is called "SDR-21" and has an internal diameter of 2.6" which is darn close to that of any tennis ball. I was fortunate to locate a supply at the local EWING Irrigation supply house. It is highly advisable that you check by you local irrigation supply, plumbing supply house or even a local plumber for this particularly oddball size - especially to support your local economy. The Home Depot, Lowe's or ACE Hardware will not carry this but you could try their online sites or have them source it for you. You should be able to readily find all the other required parts at any hardware store. The modification of the valve is easier than you may expect and the valves are relatively simple devices made by RainBird, Orbit and others and which all work on the same simple principles. All you would do is provide a quick escape of diaphragm backside air pressure through a common air release mechanism to allow it to do it's thing - QUICKLY! PHASE 1 Modifying the Sprinkler System Valve Check out this Instructables tutorial where there are step-by-step instruction on how to do this for your launcher or spud gun. https://www.instructables.com/id/Sprinkler-Valve-Modification-for-Air-Cannon/  [Above] Shown, are the parts needed
for the valve modification.
All available at your big-box home improvement store. PLEASE NOTE: RainBird no longer manufactures this model type of valve [shown here] and have moved to cheaper Mexican production. I'm curious to see how the new type could me modded but I'm sure you can do this to about every brand. Not all valves work exactly the same but you should try to only work with the diaphragm model and not the plunger version.  [Above] This is a common 1" sprinkle
system valve found at most hardware stores
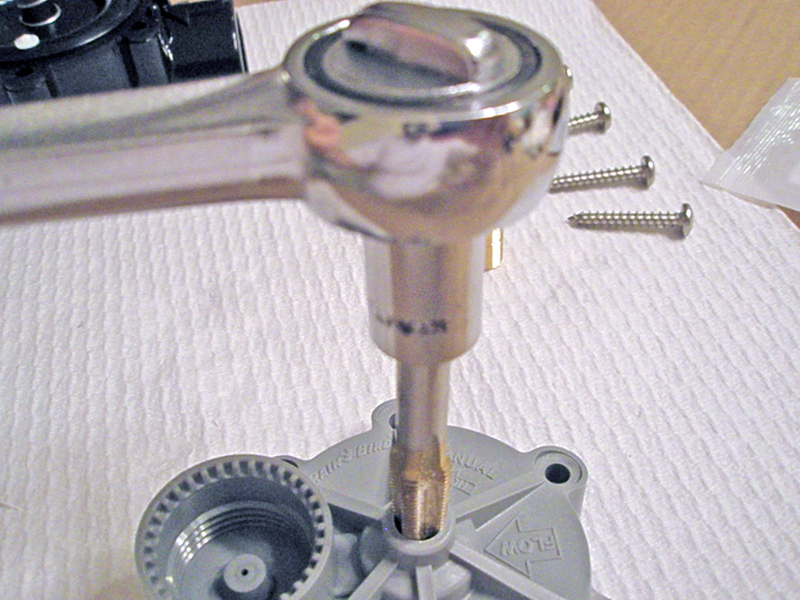
and you can get the connections in either glue-in or threaded. These types are intended for residential use and have a 24-volt controlled solenoid for actuation. There is also a pressure release control stem in the middle. Bigger and better ones can be used, especially if ridiculous amounts of firepower are needed but I do not recommend using the smaller 3/4" version. 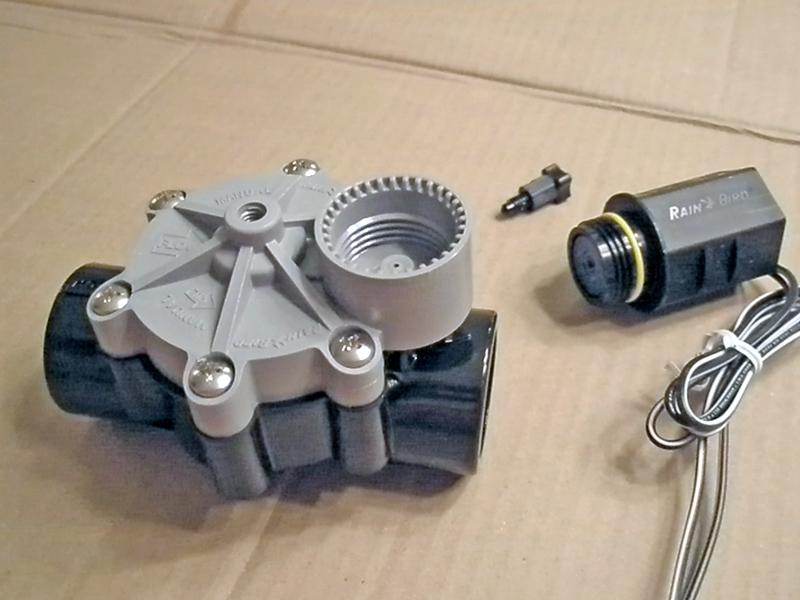 Remove the pressure
release control stem and solenoid and discard.
The should 'unscrew' counter-clockwise. 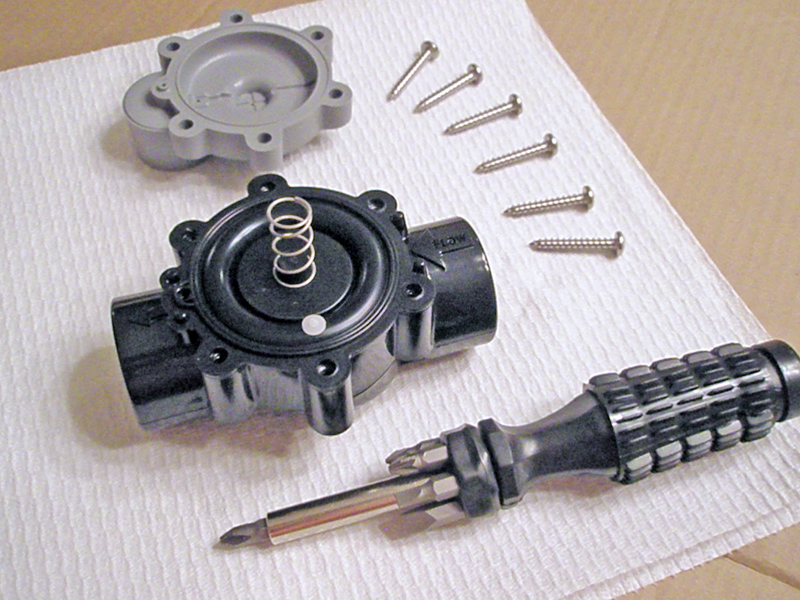 There are six long screws. With some downward
pressure to budge the screws, remove them and carefully remove the
cover.
PLEASE NOTE the contents and location of the inside parts. Some valves have many but generally just a spring. Note its placement and the placement of the rubber diaphragm. 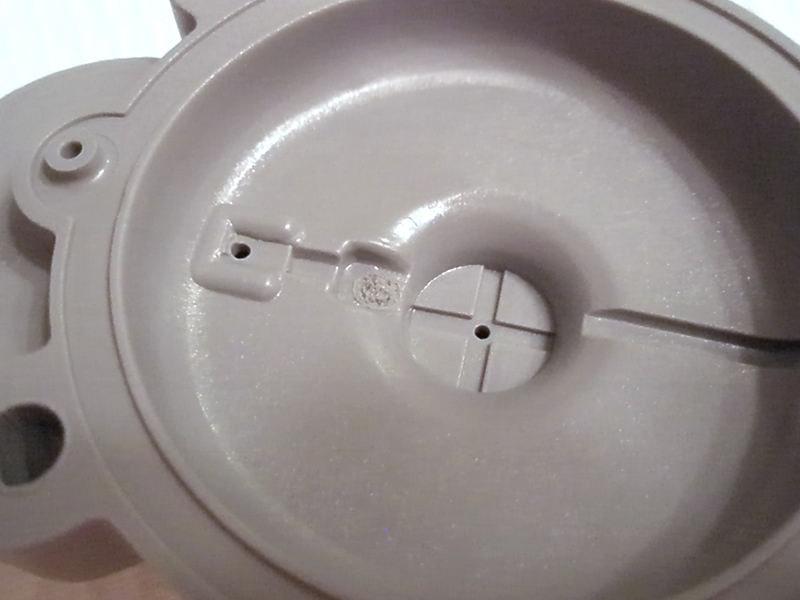 Show [above,] is the inside of the valve cover.
Note the THREE small breathing ports.
The one to the left is for the air-from-solenoid intake port. The adjacent hole on the side of the dome is the air-to-solenoid port and the middle is the manual air-release control port. These holes are TOO SMALL to promote adequate release of diaphragm equalization pressure at the volume and speed of air we require. 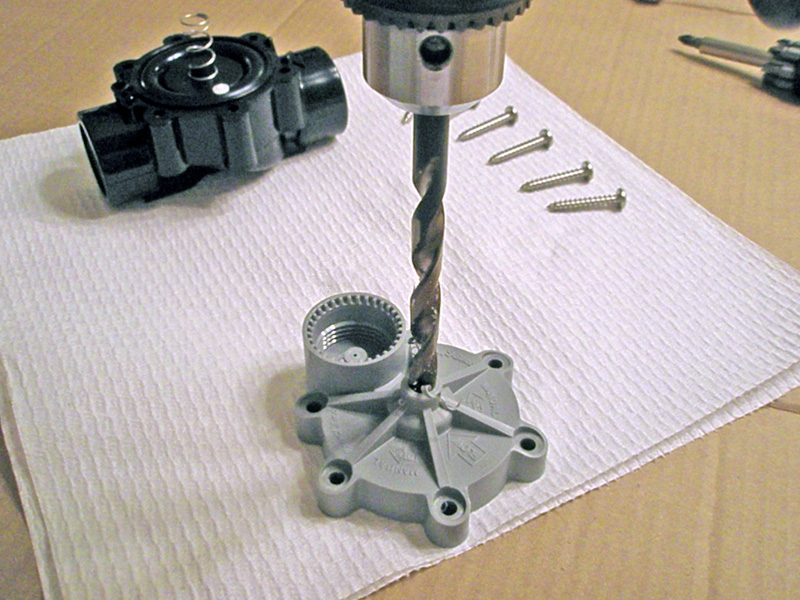 Use a drill to widen the center hole.
Start with a smaller diameter so that the stress on the
plastic will be reduced. A step drill bit is not recommended. With the model shown here. the
center area is perfect with a good wall thickness to support the
reducer connection.
 Use a 1/8" NPT pipe thread tap. With
level and firm pressure,
rotation of the tap should be done with a tap handle, but a socket wrench will work fine. Occasionally remove the tap to remove excess shavings and stop boring until 3/4th of the tap area is submerged. Tap lower if the threads are two narrow for the brass fitting.  The tap must bore at least 1/4" in
depth. Many valves lack the thickness in their cases to hold
the fittings.
The fittings will be holding the weight of any piping and/or release valve, as well as any user forces of the air-gun / trigger mechanism, so extra depth of high-strength polycarbonate should be epoxied to the surface if required. 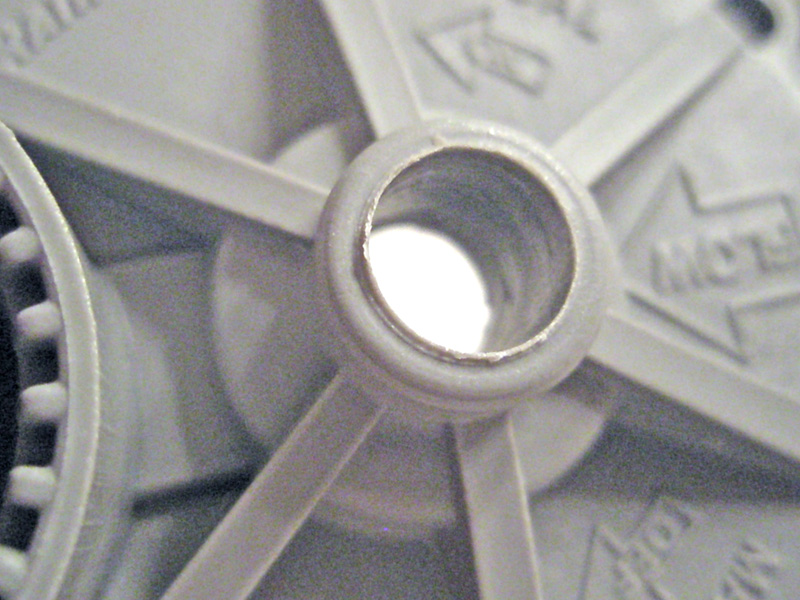  [Shown above:] 1/4" tapped hole inside the
valve cover.
Make sure to de-bur the drilled edges. 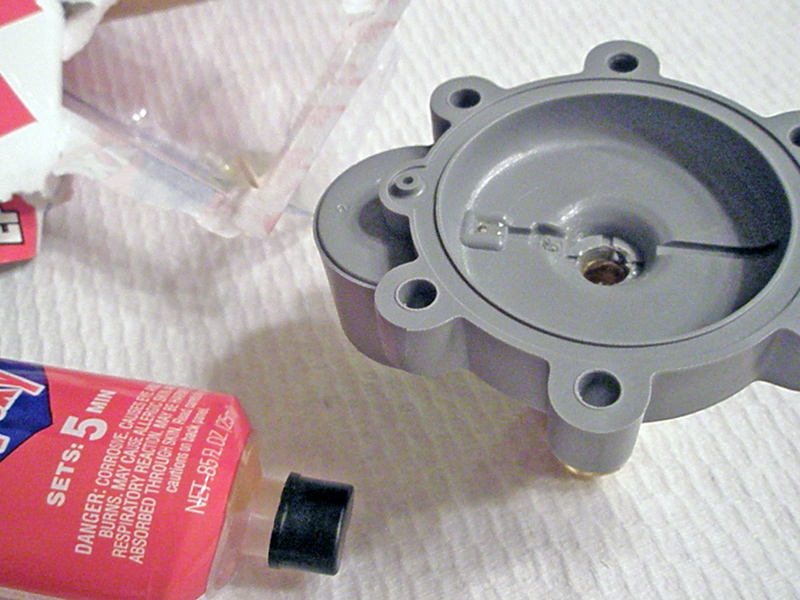 [Not shown] Yellow (gas) Teflon tape is used to
seal the threads of the Brass
NPT fittings.
I used a 1/8th" double-ended coupler and a 1/8th-14th" elbow. Mix a very small quantity of a good two-part epoxy and use a toothpick to apply it on the threads of both the cover port and the brass fitting. 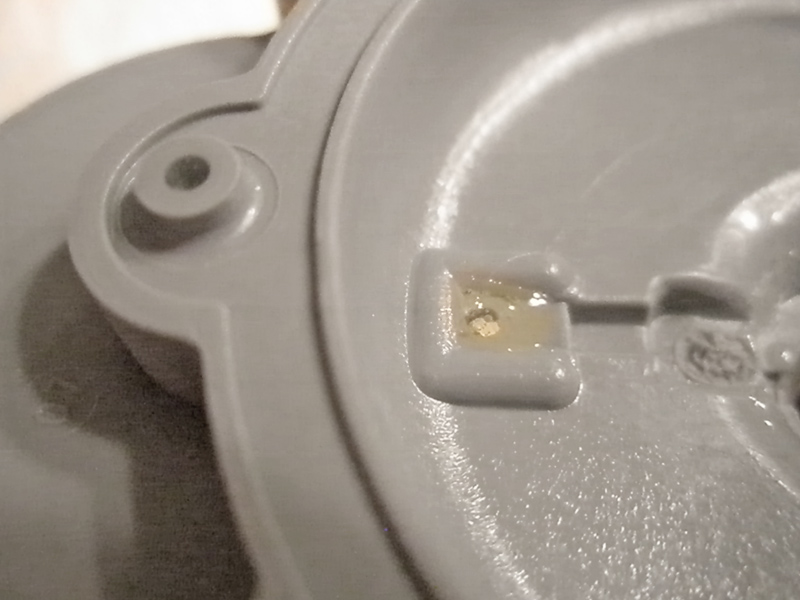 Apply epoxy with a toothpick to the remaining
breather ports as they are not needed for operation.
Carefully fill in from both sides and avoid excess. 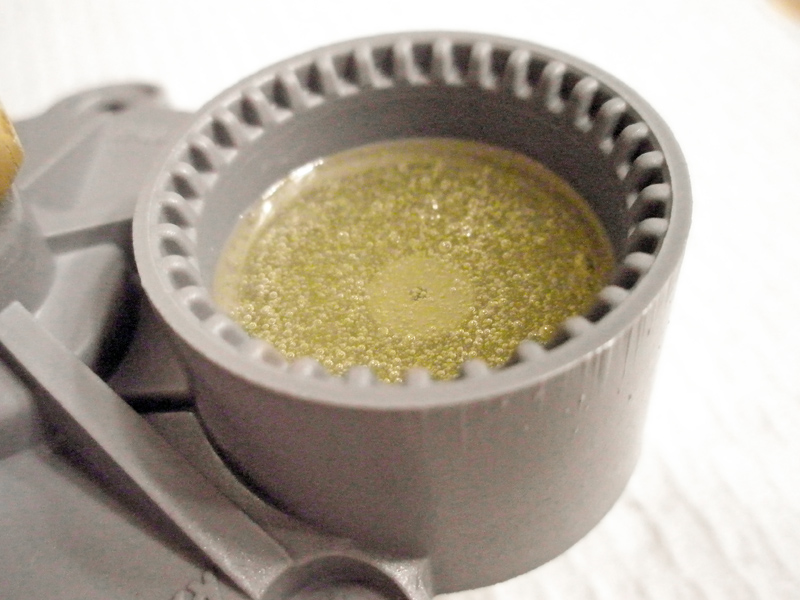 If desired, fill the small plastic solenoid cup
with more epoxy.
This is not necessary, of course, but it does look interesting. However, using extra epoxy may ensure that there will be no escape of air after future handling of the launcher and any possible unsticking of the epoxy... A mis-fire could be fatal! 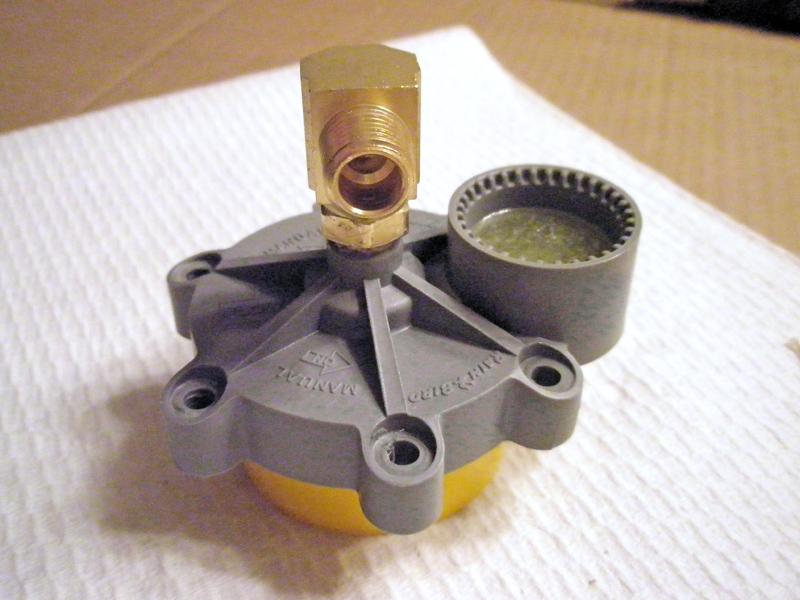 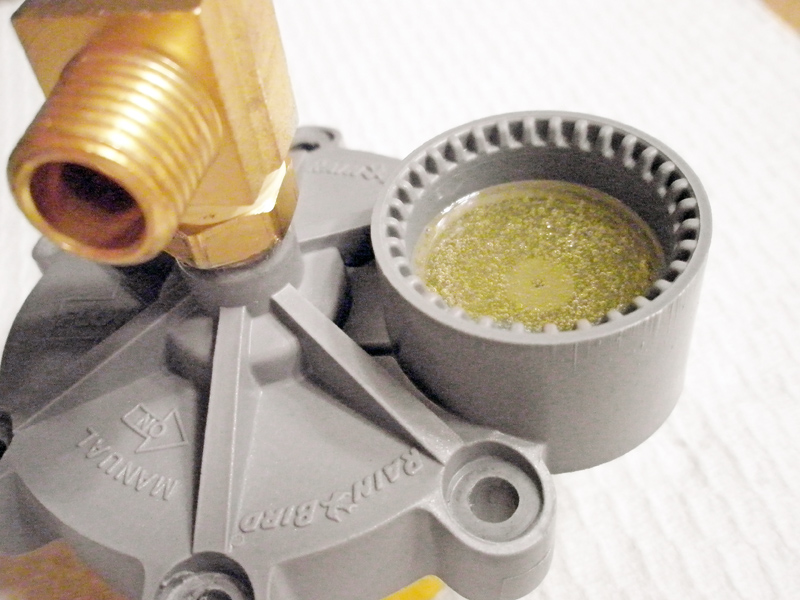 [Shown:] The top with air tap connection and
epoxy chamber fill.
Allow epoxy to set for 24 hours... Re-assemble, alternating screws diagonally across valve cover as you would do when replacing a car tire. Start off lightly at first and then gradually snug to ensure that the diaphragm is not unevenly pinched. Make sure there is no debris or dust inside the top of the diaphragm chamber! 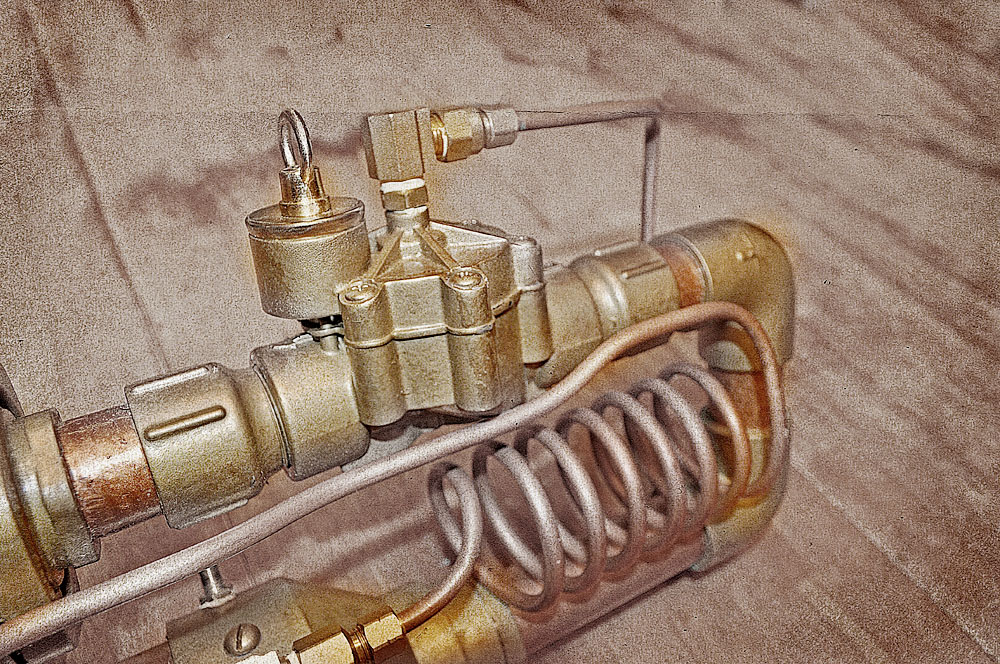  [Shown] Final vintage faux copper and brass
look applied.
See below for procedure on painting PVC... PHASE 2 Assembling Lengths of PVC Pipe    Measure
and cut all lengths of the different sections from only PRESSURE RATED
PVC.
The overall look and performance of the tennis ball launcher is up to you and you can form any combination of shapes and power level that your wallet will allow. As long as the air has a pressure tank to be stored in, an inlet valve, firing valve and barrel.  Cap ends and reducer adapter links are used to
create the barrel and pressure tank.
RULE OF THUMB: The pressure tank should hold at least twice the volume as the barrel. Volume = π x Inside Radius Squared x Length of pipe The barrel length can be longer and with an extended length you may see greater velocity. If the tank is smaller in proportion to the barrel you'll have less overall acceleration of the projectile.  [Adapter detail...]
 [More detail] NOTE: USE
ONLY "MEK" High Strength PVC primer!
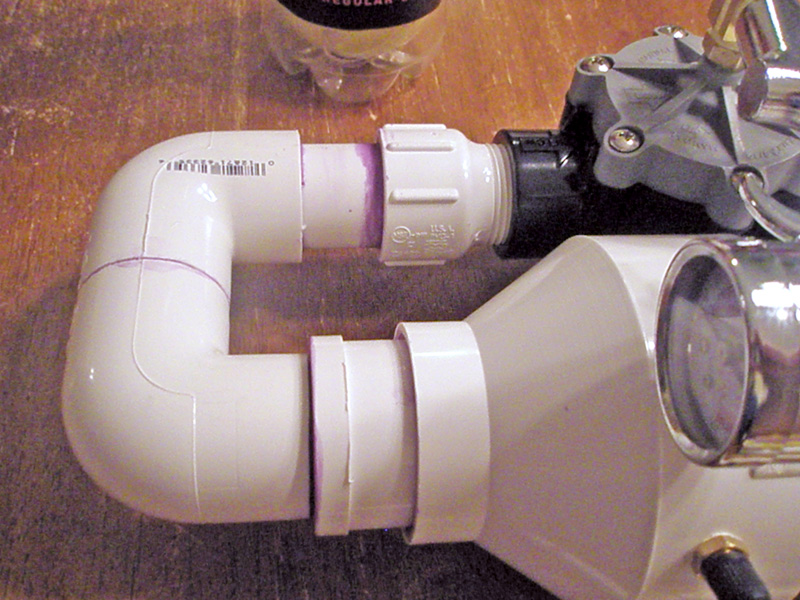
Avoid using any time-friendly cement, as a strong air-tight bond is required. 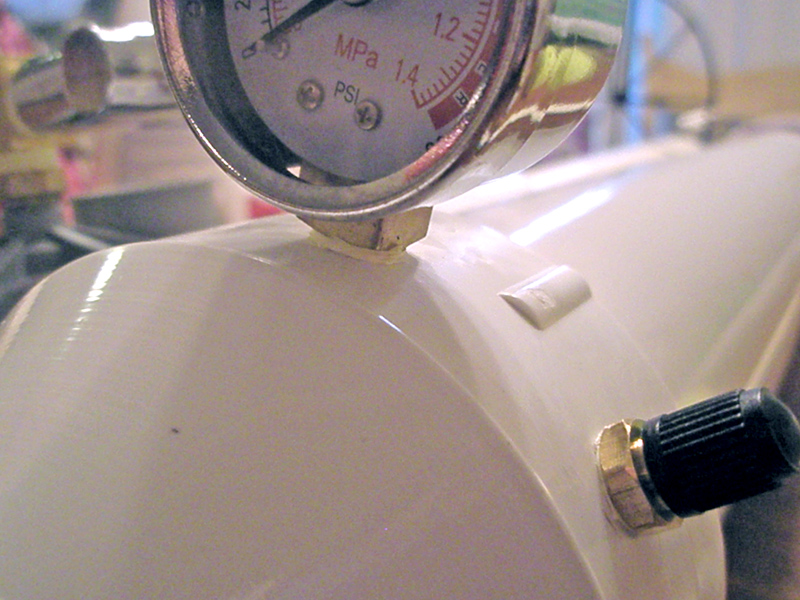 BEFORE GLUING the finished pressure chamber to
the rest of the launcher,
drill, tap and install the Schrader valve and optional over-pressure protection valve as well as an optional pressure gauge first with yellow Teflon tape. Blow out any shavings or dust that can contaminate the surface of the valves diaphragm. 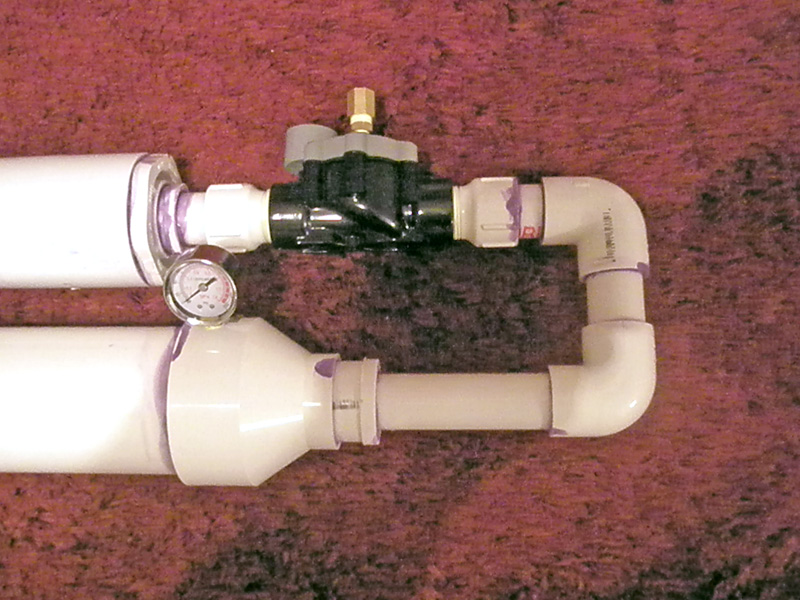 The barrel and pressure tank should be created
first before arranging in your chosen configuration.
PLEASE NOTE: If the valve is the threaded type, ensure that there is enough clearance to remove the valve if service is needed! PHASE 3 Finalization 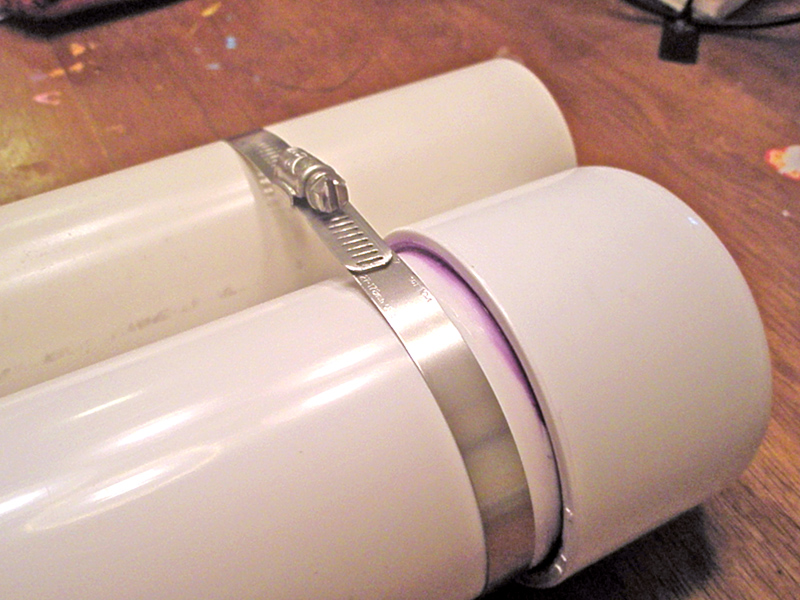 Since the barrel and tank were only connect by the 1" PVC length on the other end, it was important to shore them up to prevent damage from shifting weight. I used a stainless-steel vent pipe strap for this model. The first model has an intricate structure of brass and steel that is more for show.  Attach the valve trigger. I used a
common pneumatic air gun nozzle.
You can route to another location by use of an air hose or a fast release solenoid valve or whatever you wish. The faster the release of air on the control side of the diaphragm the more launch performance you will get.  Shown here
is a tennis ball projectile.
You may use other projectiles such as a slug made from PVC links, golf balls, potatoes, or etc... Small puppies, kittens or squirrels can add that unique tracer squeal. NO, just kidding, LOL... please don't! The tennis ball is widely used by the ham community because of it's relative safety when falling, where-as the traditional methods, namely lead sinkers, arrows and wrenches are obviously dangerous! Making the ball is simple; just cut a 1.5" gash in it with a knife - along the rubber fill line is best - then fill with a baggie of 30 pennies or steel washers for good weight which will increase velocity. Make a few loops of 30-40 lb test weight mono-filament fishing line and seal the loops halfway into the gash with a adequate application of cyanoacrylate (Super Glue.) I prefer the Gorilla brand rubberized Super Glue. Then Cure overnight...   Shown
here is the final assembly. Two slight variations are shown.
Certain brands of tennis balls are a tight fit but provide improved velocity. A chuck stick should be used but ensure that the tank is NOT pressurized at the instant whenever the chuck is within the barrel! PHASE 4 Testing It is very important to test your launcher before field use!!! • Fill air chamber with 20 psi to begin testing for catastrophic failure. Submerge the launcher in the bath tub or place under a few towels as shrapnel from exploding PVC can be lethal! • Take out of water and squeeze the valve trigger... It should make a "barking" noise! I suggest using ear-plugs as the release of pressure and noise decibel level can be harmful to your hearing. • Increase pressure by 20 psi increments until you reach the maximum. - PLEASE NOTE: You should be safe if you never exceed 1/3 of the max psi rating on the largest diameter (thus weakest) PVC pipe. Since I'm using 3" pipe for the tank, and it's rated at 260 psi, I use 90 psi as my max (actually 100psi)... It does well and I can send a ball 400" (at a 45 degree angle), so it should be sufficient for ham use. • Take to an open field and try the projectile by itself. Start off at smaller psi increments and gauge the height and distance that each level brings. You'll notice that the yield-to-pressure ratio is exponential! DESIGN NOTES: • When a thicker diameter ball is used and when more weight is added the resultant back pressure will cause the projective to go farther and faster. • Be careful to tighten connections and seals. Loss off air pressure in the trigger line will cause unintended misfiring!!! • 40 or 50 lb test fishing line with an easy sun-catching day-glow color is recommended for the tow line. Check out Andrey, AE1S's antenna launcher build with it's paint job inspired by my build! http://blog.kotarak.net/2011/04/say-hello-to-my-little-friend.html    SAFETY RULES AND PROCEDURES: 1) LEAVE BARREL CHAMBER EMPTY 2) ONLY FILL TO SAFE PRESSURE LEVELS - DO NOT OVERFILL! 3) POINT AWAY FROM PEOPLE, PARTS OF YOUR BODY, PROPERTY, PETS, ETC. ALSO AWAY FROM LOCAL POTENTIAL RICOCHET SURFACES 4) NEVER - NEVER - NEVER AIM OR FIRE THE LAUNCHER WHERE THE PROJECTILE OR TOW LINE CAN COME IN CONTACT WITH ELECTRICAL SERVICES 5) FIRST, POINT LAUNCHER STRAIGHT UP IN THE AIR, PLACE BALL IN AFTER. THEN AIM SLIGHTLY HIGHER THAN TARGET TO ADJUST FOR SLOPE AND DRAG. 6) WARN NEARBY PEOPLE! 7) DEPRESS TRIGGER QUICKLY WHILE HOLDING FIRMLY  Launcher in
action at the Jamboree On The
Air. Launcher in
action at the Jamboree On The
Air.HOW TO PAINT PVC PLASTIC: 1) First - Clean surface with alcohol and lightly sand with a high grit to rough up the surface. 2) Coat entire surface with a liberal application of "Purple Primer"  This is an aggressive solution of
tetrahydrofuran and methyl ethyl keytone.
Very toxic to breath, but effective. 3) Within the first few minutes after the excess liquid primer has evaporated - Paint surface with a neutral color spray paint formulated for PVC plastic. The spray paint manufacturers claim that this paint will adhere to PVC. But in testing it usually peels off after a while. 4) Apply a new coat, once dry to the touch, with the spray paint color of your choice. - Re-apply with second or third coat later. For a vintage finish there are paints for that. Metal can be achieved by first applying a standard metallic color. These usually have a flatter look. Then patting on a super reflective chrome-like version of the paint with a paper towel or sponge. Other effects, like corrosion or weathering, can be done with diluted mixes of other paint colors. Disclaimer: Michael A. Maynard, a.k.a. K4ICY, cannot be held liable for any cause and effect due implementation or any reproduction of any device shown on this site, nor are operational results guaranteed. [Abracadabra, In hoc agricola conc, in est spittle louk.] Edited: 07/16/20 (c)2020 Copyright - Michael A. Maynard, a.k.a. K4ICY |